How To Reset an Arduino MCU from Code
2026-03-11 | By Maker.io Staff

Resetting an MCU from code is useful in a variety of applications, ranging from rebooting the runtime environment to recovering a device stuck in a loop. Choosing the right method can prove tricky. Read on to learn why software resets are useful in DIY projects, what approaches exist, and how to pick the best one for your board.
Why Software Resets Matter in DIY Projects
Resetting an Arduino from code can be useful in many situations. On boards that run a higher-level operating system (OS) or framework, certain system-level tasks only happen during a full reboot. Restoring the system’s initial state is usually not possible by repeating the initialization logic of the custom program. For example, a complete reboot may include tasks such as initializing network stacks, reloading USB interfaces, or resetting timers, peripherals, and GPIO states.
Fully rebooting an MCU typically ensures that all registers, counters, and control logic return to their default conditions, which is difficult to manually reproduce consistently in software. However, resetting an MCU from code is also practical in designs where users need an accessible reset button without physical access to the board, or in remote setups where a device must be able to restart on its own in case of problems.
Preferred Platform-Specific Reset Methods
Many modern ARM-based Arduino-compatibles implement the Common Microcontroller Software Interface Standard (CMSIS), which aims to provide consistent APIs across CPU architectures. Most Arduino boards with an ARM MCU implement a universal reset function that allows user programs to restore the initial system state with a single function call:
void setup() {
  Serial.begin(9600);
  delay(1000);
  Serial.println("Board will reset in 2 seconds...");
  delay(2000);
  NVIC_SystemReset(); // trigger a full MCU reset
 }
void loop() { /* … */ }
This barebones example illustrates how to use NVIC_SystemReset() to trigger a full MCU reset from an Arduino sketch. It works with Arduino cores that expose the CMSIS API, including SAMD-based devices, STM32 boards, nRF52/Nordic devices with a Cortex-M CPU, and the RP2040. However, support or include statements required may vary depending on the board, and it’s worth checking the manufacturer’s documentation to ensure NVIC_SystemReset() is available.
NVIC_SystemReset is the preferred method for resetting boards that implement CMSIS. However, there is a small caveat when using additional OS layers or software stacks on top, for example, FreeRTOS, Mbed OS, or Nordic Softdevice. In these cases, it’s generally recommended to reset the system via the platform-specific API to avoid leaving subsystems in an inconsistent state. For example, when using nRF52/Nordic boards with SoftDevice, Nordic recommends calling sd_nvic_SystemReset() instead of NVIC_SystemReset() to ensure the system safely handles the reset. Similarly, Mbed OS implements a custom mbed_reset() function that reboots the system and ensures that the OS correctly quits and re-initializes all components.
SBCs that do not implement CMSIS usually have custom reset functions. For example, Arduino devices based on the ESP32 and ESP8266 can be reset using ESP.restart():
void setup() {
   Serial.begin(9600);
   delay(1000);
   Serial.println("Board resets in two seconds...");
   delay(2000);

 ESP.restart(); // trigger a full MCU reset
}
void loop() { /* … */ }
AVR-based Arduino boards like the Uno, Nano, Mega 2560, and Micro do not expose the CMSIS reset functions. In these cases, developers have to fall back to using other methods, such as a watchdog timer or hardware reset.
Watchdog Timer and Event-Based Methods
Watchdog timers (WDTs) are a standard way in embedded development to prevent devices from getting stuck in endless loops. In this technique, the setup code starts a timer that runs independently of the CPU, and the program needs to reset the timer in periodic intervals. If the CPU fails to do so in time, the WDT hardware triggers a clean system reset, effectively preventing the program from getting stuck in an endless loop.
Using a watchdog library, such as Adafruit SleepyDog, is the easiest and safest method to implement WDT functionality across platforms:
#include <adafruit_sleepydog.h>
void setup() {
   Serial.begin(9600);
   delay(1000);
   Serial.println("Board resets in two seconds...");
   Watchdog.enable(2000); // WDT with two-second timeout
   while (true); // don’t reset the watchdog, let it expire
}
void loop() { /* … */ }
Hardware-Based Methods
Relying on built-in timers or platform-provided reset functions works on many boards; however, these approaches depend on the operating system or core not crashing. This method also requires the SDK to expose a reboot function to the user program, which not all cores do (for example, most AVR-based boards do not).
Watchdog timers can provide a reliable reset even if the software hangs, and they are great for preventing programs from stalling indefinitely. However, WDTs are not always suitable for implementing user-accessible reset buttons or responding to custom events, such as losing a network connection.
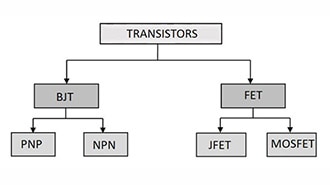
In these cases, external hardware can help trigger a full system reset. On SBCs with an active low reset line, the simplest setup requires only a transistor, a current-limiting resistor, and a pull-up on the reset line. The transistor, controlled by a GPIO pin, can pull the reset pin low, effectively pressing the reset button via software. The transistor isolates the reset pin from the GPIO lines to prevent non-deterministic states during boot. This approach ensures a reliable and complete hardware reset that restores all registers, peripherals, and timers to their default state.
 This example illustrates how to use an NPN transistor with some additional resistors to implement a software-controllable reset switch on the Arduino Uno.
The Arduino code can then trigger a reset by pulling the transistor’s base pin high (NPN) or low (PNP):
#define TRANSISTOR_PIN 4
void setup() {
   Serial.begin(9600);
   delay(1000);
   Serial.println("Board resets in two seconds...");
   delay(2000);

   pinMode(TRANSISTOR_PIN, OUTPUT);
   digitalWrite(TRANSISTOR_PIN, HIGH);
}
void loop() { /* … */ }
You can use a similar approach for boards without a reset pin. In those cases, external components such as a relay or FET can power-cycle the entire board by briefly switching its supply voltage off and on.
Alternatively, dedicated supervisor ICs like the MCP130 or DS1818 can monitor the system and automatically reset or power-cycle boards that have become unresponsive. These dedicated ICs provide more robust reset functionality, as they remain functional even when the software hangs. However, they require slightly more complex electronics compared to the simple transistor setup.
Summary
Resetting an MCU from code can be beneficial—from restoring the hardware’s initial state to bringing a stuck device back online. Developers should rely on existing SDK functions whenever possible, as they ensure that all necessary steps required for a reboot occur in the correct order. Most Arduino-compatible boards expose NVIC_SystemReset() through their cores, making it the preferred reset method. When additional software layers are present on top, such as Mbed OS or SoftDevice, developers should use the higher-level reset functions instead.
Watchdog timers (WDTs) can be a reliable alternative for boards that do not include a reset function in their core. However, WDTs are mainly intended for restarting a board that’s stuck in a loop.
Hardware switches can offer a more direct replacement for SDK reset functions. They simulate pressing the reset button on the board by pulling the reset pin high or low, depending on the board. On most Arduinos, a single transistor and two additional resistors are enough to pull the reset pin low to trigger a reboot. For boards without a reset pin, external components such as a relay, FET, or supervisor IC can power-cycle the board to achieve a similar effect.